Node Rover 2
1. Project Idea
I have previously made a web-page controlled rover using Node.js, you can check it out here. So this time with some upgrade, I decided to make a “voice-controlled, obstacle avoidance rover”.
2. Project Aim
To remotely control a rover by giving voice commands to it from a mobile web-page and to detect and stop automatically as soon as it faces any obstacle.
3. Prerequisite
You need to have some basic knowledge of Node, socket programming, and L298 Motor Driver working.
4. Requirements
- 1 Arduino Uno
- 1 L298 Motor Driver
- HC-05 Bluetooth Module
- HC-SR04 Ultrasonic Sensor
- Jumper Wires
- 2 Battery – 9 volts each
- 2 gear Motors (6-9 volts)
- 2 compatible wheels
- Chassis
- Computer with Node.js installed for our server.
5. Building The Rover
To build this rover you need to purchase a “2 wheel chassis kit” which is easily available online and comes with all assembling units.
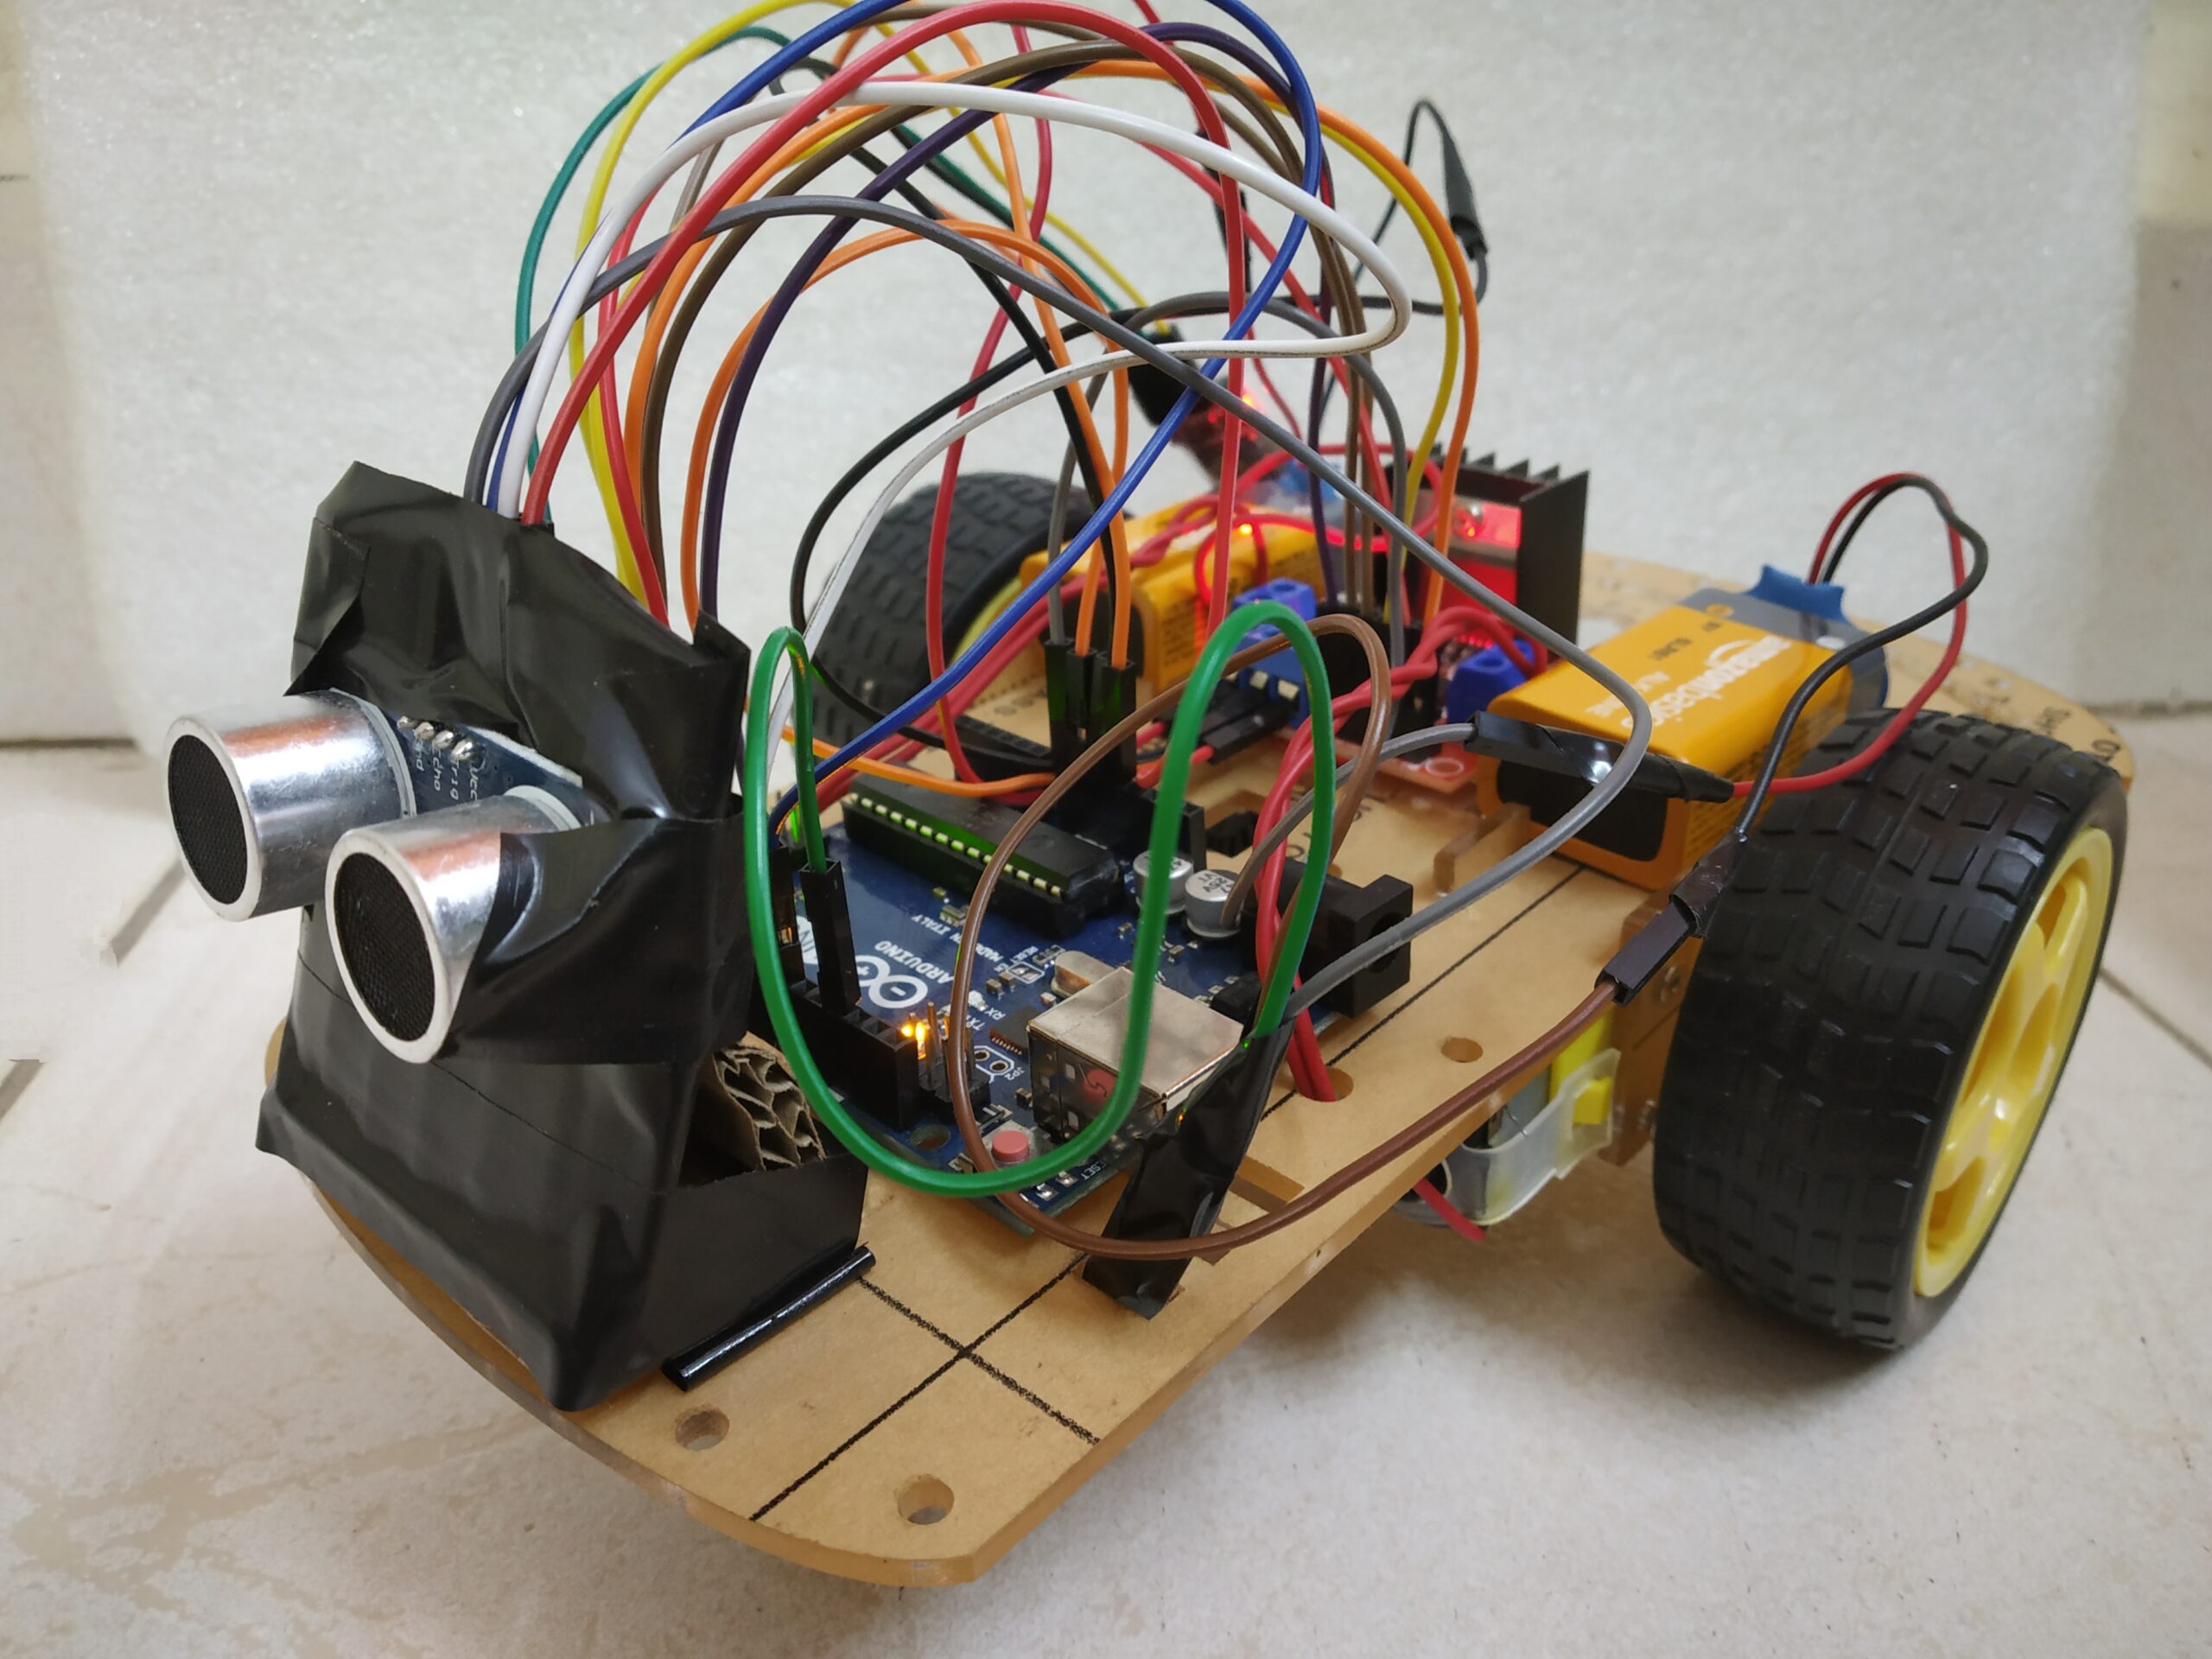
Our Arduino Uno and L298 Motor Driver are embedded on top of our Chassis, both of which are powered by two 9 volts battery separately.
Arduino Uno in turn will power the HC-05 Bluetooth module which will communicate with our server. And L298 Motor driver, in turn, will power the HC-SR04 Ultrasonic Sensor with its 5V output pin.
6. Circuit Diagram
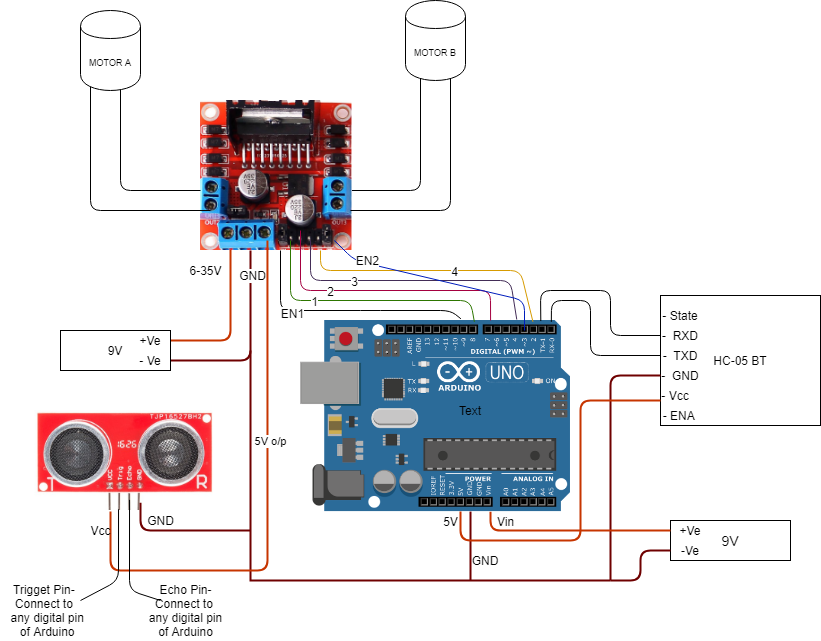
As shown above the circuit diagram, the L298 motor driver is powered by a 9V Battery, the two motor control outputs are connected to Motor A and Motor B and as the motor has no polarity you can connect any terminal to it, but make sure that both motors rotate in the same direction.
L298 will also power our HC-SR04 Ultrasonic module with its 5V output pin as shown in the above image. Do not remove the 5V regulator jumper.
Note: if you power L298 with more than 12 volts, the onboard 5V voltage regulator will be damaged.
Arduino Uno is also powered by a 9V battery with its positive terminal connected to the Vin pin of Arduino and the negative terminal to the common ground. Arduino in-turn will power the Bluetooth module, so connect the Vcc pin of HC-05 to 5V of Arduino and GND to ground.
For serial communication between HC-05 and Arduino, connect the TXD pin of HC-05 to the RX pin of Arduino and RXD pin of HC-05 to the TX pin of Arduino.
Now to control the L298 module you can connect the EN1 and EN2 pin with any PWM pin of the Arduino. And then connect L298’s Input pin -1, 2, 3, 4 with any digital pin of Arduino.
7. Data Transmission

As shown above, is a diagram showing the transmission of data.
- The user will open the web-page served by the node server. Both Mobile and Node-server should be connected to the same internet network. The URL would be the IP address with port number used, for e.g- “192.XXX.XXX.129:8080”.
- The user gives voice commands to the web-page, after recognizing it the web-page will send the required data to the Node server using socket connection.
- The Node server will pass on the data to the HC-05 Bluetooth module, as both are paired.
- The HC-05 will transmit data to Arduino UNO using serial communication.
- The Arduino UNO in turn will control the L298 module
8. Setting up the server
For our server, we need to install Node.js. Install any stable version of node, mine is 11.15 version. We need to install the following packages-
Note – Installation of “node-gyp” might be tricky as it does not support some latest version of Node, so better install version 11.15 of Node.
Now, We need to listen to events from a web page, and to host that webpage we will need a server. So, create a server using a package like “express.js” which will make our job much easier.
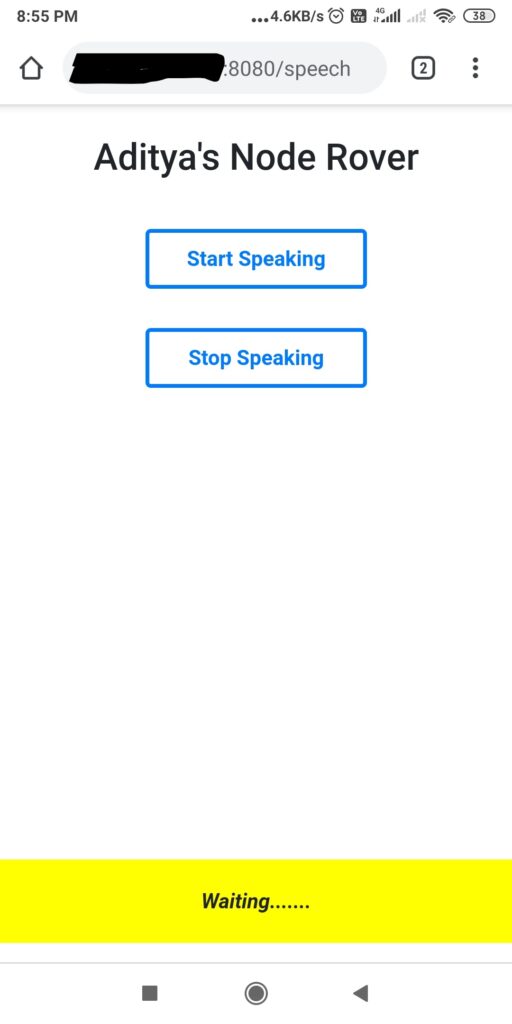
After the server setup, we need to design a webpage from which we will give voice commands. Here I have used the package “ejs” to render the webpage. But giving voice commands is not enough, we also need to recognize the speech in order to control our rover. So for speech recognition, we will use theWeb Speech API, which will give text as an output for whatever we speak.
Here is my web page –
NOTE – Speech recognition will not work for non-secure web pages, so will not work for URL containing your IP-address.
To make it work you need to set your URL as secure in your Chrome browser, so just visit this link “chrome://flags/#unsafely-treat-insecure-origin-as-secure” in your chrome browser and add your URL.
Now, as soon as we speak something and if it’s an eligible command, we will emit a socket-message with the required data to the Node server using the package “socket.io”.
After receiving a message from the webpage the Node server will pass on the data to the HC-05 Bluetooth module, and for that, we will use the “node-bluetooth” package.
9. Obstacle Avoidance Logic

The HC-SR04 Ultrasonic Sensor can detect an obstacle when placed in front of it. So we need to calculate the distance between the obstacle and the rover using the distance-speed-time equation, find the code implementation attached, or refer to this blog for more information.
After getting the distance we will set a limit, crossing which will stop the rover. For example, in this project, I have set a limit of 17cm, which means as soon as the distance between the obstacle and the rover goes below 17 cm the Rover will stop automatically.
10. Arduino Code
As Bluetooth will communicate with Arduino-Uno using Serial Communication we will send some “string” as a command with an additional letter which will tell us to terminate and capture the string.
For example-: to move forward, Bluetooth will transmit “forwardT”, and in the Arduino end, as soon as we encounter the letter “T” we will know that serial communication is completed and the string captured is “forward”.
And with that incoming string command, we will configure the L298 driver to move forward, backward, left, right, alter the speed, etc.
Find the Arduino Code attached.
11- Final Result
Attachments
Arduino Code – noderover2


